
Breads (Yeast) - Buns/Rolls
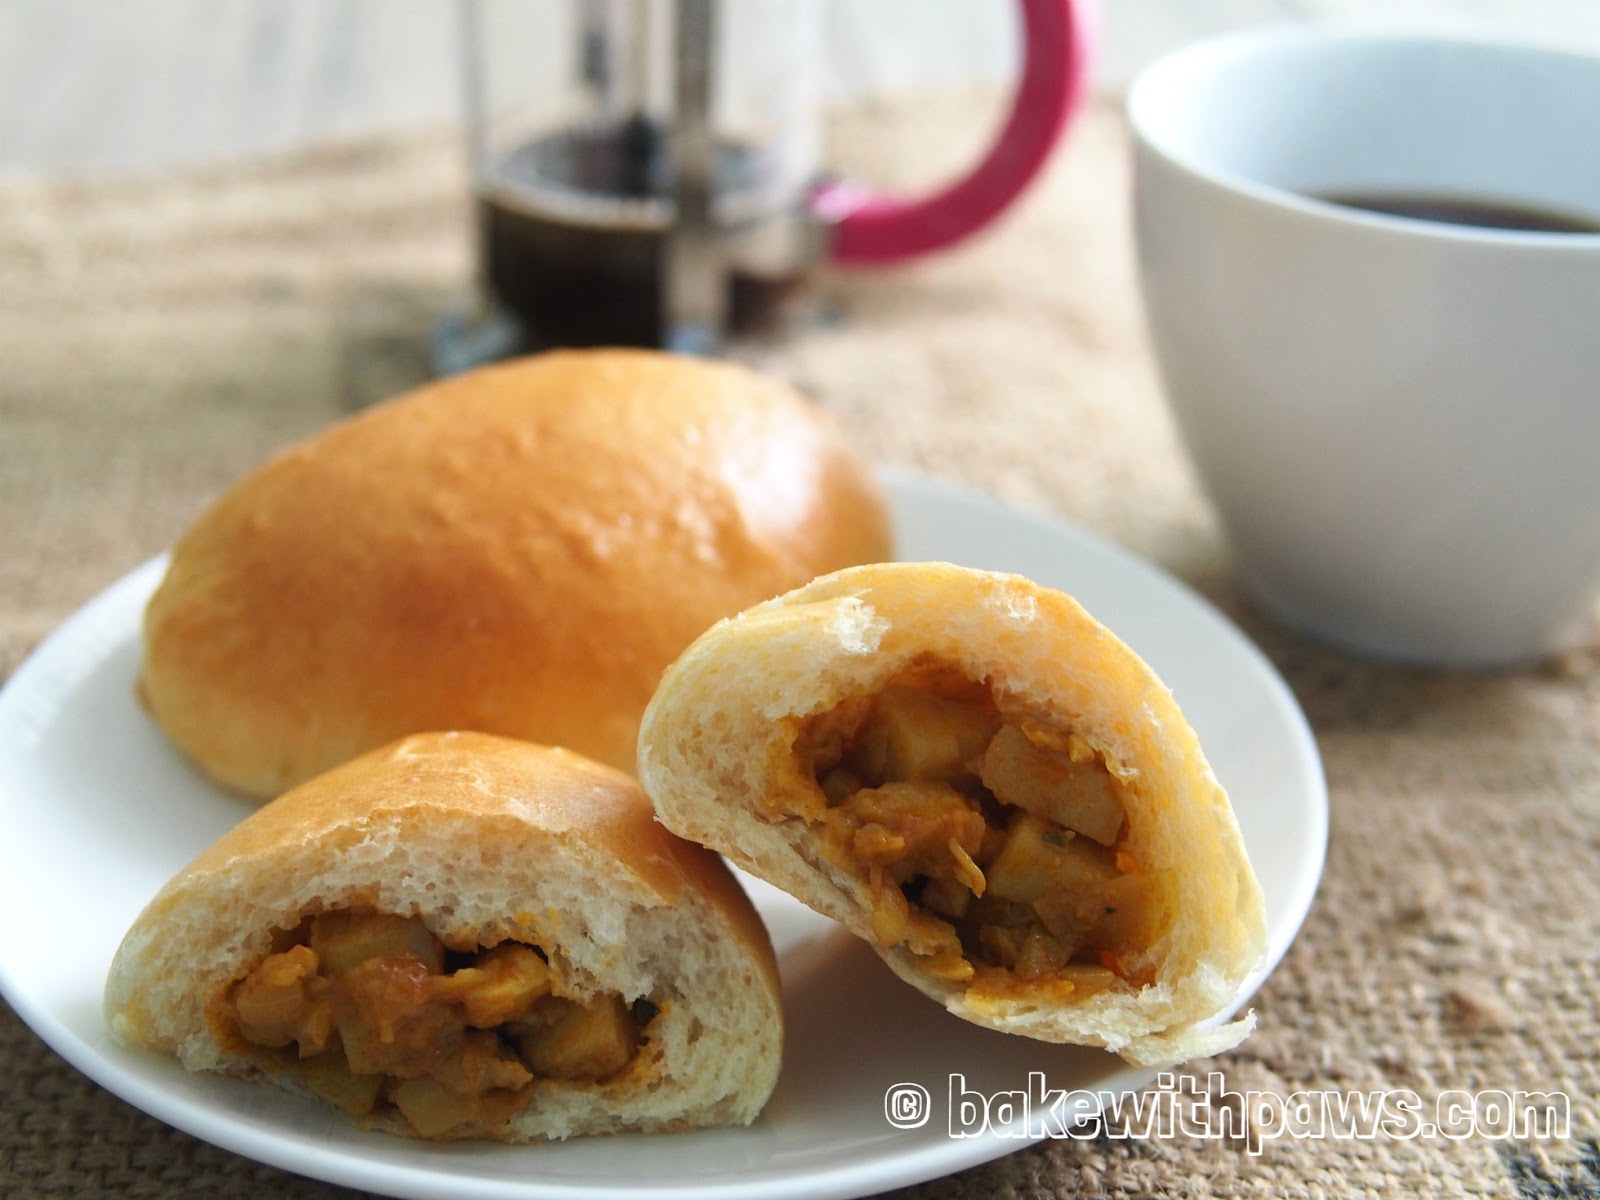
Curry Potato Buns
July 20, 2017
| Recipe by Bake with Paws

Scroll to the bottom of the page for "PRINT RECIPE" ⬇
It was my hubby’s idea to make this cos it reminds him of the buns we used to have when we were kids. I remember I used to get this from the School Canteen for something like 10 or 20 cents only. We are paying between RM2.00 to RM4.00 for a bun these days. This is a comfort food snacks for us Gen-X Malaysians.
If you have any questions regarding this recipe or any other post, please leave me a comment in the “LEAVE A COMMENT” link and I will reply you as soon as possible. Do tag me on Instagram @Bakewithpaws if you attempt on this recipe.
Recipe - Curry Potato Buns
Yields: 13 buns
INGREDIENTS:
Curry Potato Filling:
450g, around 5 medium potatoes, peeled and cut into small cubes
2 large onion, roughly chopped
2 cloves garlic, chopped finely
3 to 4 tablespoons vegetable oil
2 tablespoons meat/chicken curry powder, mixed with some water to become a paste
Water
Salt to taste
Mushroom seasoning or chicken stock to taste
3 sprigs curry leaves
BUNS
Old Dough:
210g bread flour (I used Japan High Gluten Flour)
1/4 round tsp (1.2g) instant dried yeast
210g bread flour (I used Japan High Gluten Flour)
1/4 round tsp (1.2g) instant dried yeast
1/4 tsp sugar
135g water
Main Dough:
210g bread flour (I used Japan High Gluten Flour)
135g water
Main Dough:
210g bread flour (I used Japan High Gluten Flour)
1/2 round tsp (2g) instant yeast
3 tbsp (30g) brown sugar
1 ½ (7g) tsp salt
50g whisked egg (from 1 large egg)
90g milk (reserve 10g and add in the balance if needed)
35g butter
3 tbsp (30g) brown sugar
1 ½ (7g) tsp salt
50g whisked egg (from 1 large egg)
90g milk (reserve 10g and add in the balance if needed)
35g butter
Egg wash:
1 egg + 1 Tbsp water, whisked
Utensil:
Utensil:
2 baking trays, lined with parchment paper
METHOD:
- Curry Potato Filling:
- Heat oil in a wok and saute garlic, onion and curry leaves.
- Add in curry paste and stir for a while then add in potatoes.
- Add some water and season with salt and chicken stock. Turn down the fire and let it simmer till potatoes are soft and curry is dried. Keep aside to let it cool before using.
- For the Old Dough:
- Combine water, yeast and sugar in a mixing bowl. Then mix in bread flour and knead with your hand for few minutes until smooth. Roll into a ball and place in a greased bowl. Cover with cling film and let it prove for 1 hour in a warm and dark place.
- After 1 hour, place into the refrigerator overnight for at least 12 hours or up to 36 hours. The next morning, take out the old dough from refrigerator to return to room temperature 30 minutes before using.
- Kneading Main Dough For Buns:
- Put all ingredients (start with salt, flour, yeast, sugar, butter, egg, fresh milk, and old dough) into the bowl of stand mixer. Using the dough hook on a stand mixer, knead until the dough comes together, become elastic and tacky but not sticky. Tacky dough behaves sort of like a Post-it note, sticking to a surface but peeling off easily. It takes around 12 - 15 minutes at medium speed. If the dough is too dry, add 1 teaspoon of milk at a time.
- 1st Proofing:
- Let the dough rise in a warm place for 60 minutes or until double in size in a large greased bowl, covered with cling film or kitchen towel.
- Shaping:
- Punch down the dough to release the air. Transfer the dough to a clean floured surface then divide into 13 equal portions.
- Shape each dough into a ball. Rest for 10 minutes to relax the dough.
- Flatten the dough and roll into a flat circle. Place about 1 ½ tablespoon of curry potato filling in the centre, wrap and seal. Shape the bun into an oval shape.
- Place the buns onto the prepared baking pan, about 2 inch apart.
- Final Proofing:
- Let it rise for another 45 - 60 minutes or until about double in size.
- Baking:
- Preheat the oven to 180C - 190C for about 15 minutes.
- Brush with egg wash and top with some ikan bilis.
- Bake at preheated oven for 15 – 20 minutes, or until golden brown.
- Remove bun from oven and let them cool on rack.
GENERAL NOTES:
GLUTEN DEVELOPMENT & WINDOWPANE TEST
Gluten forms when flour comes in contact with water. Hydration of the flour causes the sticky and stretchy protein to form, giving structure to the bread. This makes your bread trap air and rise.
Gluten in dough can be developed by autolyse, resting, kneading or folding.
The windowpane test is used to determine whether the dough has been sufficiently kneaded. By gently pulling the dough (or you may pinch off some dough) and trying to stretch it into a thin membrane. If you are able to stretch the dough paper thin and translucent without tearing, then the gluten is fully developed. However, if you can stretch it without tearing but the membrane is not transparent, then the gluten is not yet fully developed.
However, from my experience not all the recipe can achieve a thin and translucent window pane stage easily. For example low hydration and low fat dough. For such recipes, a reasonable window pane is good enough and it can be left to rest. Gluten will continue to develop while resting. Exercising restraint to not over-knead the dough prevents the gluten from being overworked and broken. Some of you may have experienced the dough breaking during the second proofing. It is because the dough is over kneaded.
The total kneading time for me is usually 15 minutes at low speeds except brioche dough with high fat percentage or dough using liquid fat which usually takes a little longer (maybe 18-20 mins).
From my experience, I found that high hydration dough with high percentage of fat will be easy to stretch and achieve a paper thin windowpane stage.
KNEADING TIME
For kneading, please regard the timing provided as an indication only. It is only meant as a guide. Timing may differ depending on the brand of flour and electric mixer used. The protein content may vary from one brand of flour to another.
FLOUR
The right flour plays a very important role in bread making. To achieve fluffy, soft and light bread, I used Japan High Gluten Flour in most of my bread baking. The protein content is around 12 - 13%.
HYDRATION
The liquid measurement given is also a guide. It is advisable to always reserve some liquid and not add it all in one go. This would give you the opportunity to adjust if necessary. If dough is too dry, add the reserve liquid one tablespoon at a time until the right consistency. This is because each flour absorbs water and hydrates differently.
PROOFING
Please note that the proofing timing may also vary depending on your climate and environment. The humidity and temperature at your place will influence how dough rises.
If you are unable to judge by just looking at the dough, you can do the finger poke test:
- First Proofing:
- Lightly flour or oil your finger or knuckle, gently poke in the centre of the dough then remove your finger. If it bounces back immediately without any indentation then it needs more time.
- If the indentation stays and it doesn’t bounce back or if the dough collapses, then the it is over proved.
- If it bounces back just a little, then the dough is ready to be punched down and shaping.
- Second Proofing:
- Lightly press the side of the proved dough with your finger. If it bounces back immediately without any indentation, it means the dough is under proved and needs more time before baking.
- If the indentation stays and it doesn’t bounce back, it means it has been over proved.
- If the indentation slowly bounces back and leave a small indentation, it is ready to bake.
- There will be a final burst of rising once the bread is placed to bake in the oven and it is called oven spring.
WRINKLE TOP OR SHRINKING
If your bread collapses or gets wrinkled on top after removing from oven, it could be because your dough over proved during the second proofing. Please proof until it rises 80 - 90% in size or is slightly below the rim of the pan.
BAKING TEMPERATURE & TIME
Do also note that the baking temperature and timing provided are what works for my oven and should also be regarded as a guide only. Every oven behaves a little differently, so please adjust accordingly for your oven.
Labels:
Breads (Yeast) - Buns/Rolls,
Comments
Post a Comment