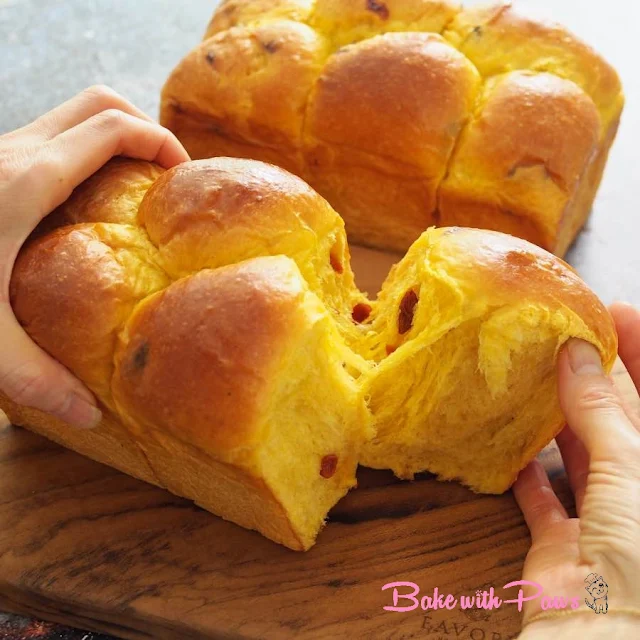
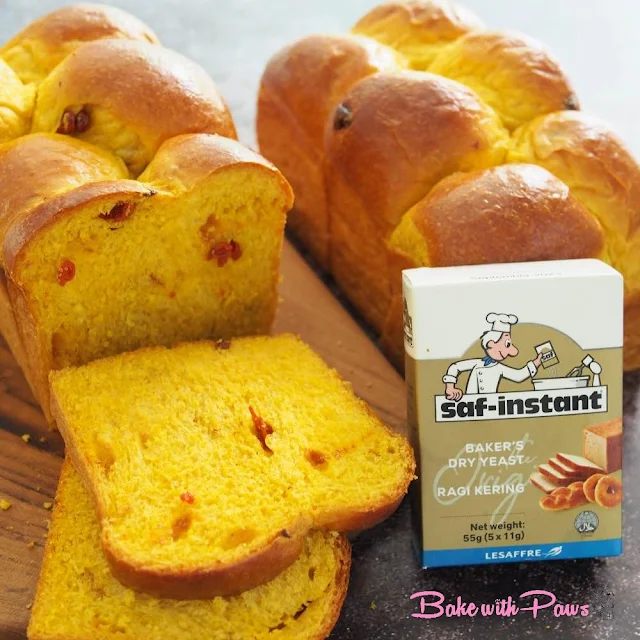
Soft Goji Berry Brioche – Naturally Sweet, Golden & Fluffy
Goji Berry Brioche (With Old Dough Method) – Soft, Fragrant & Naturally Sweet
Why You’ll Love This Recipe
-
Naturally sweet and fruity – Goji berries add a pleasant sweetness, allowing you to use less sugar while still achieving great flavor.
-
Beautiful golden color – The natural pigment of goji berries gives the brioche a gorgeous golden-yellow hue.
-
Soft, rich texture – Thanks to the old dough method, the bread turns out incredibly tender with a fine, delicate crumb.
-
Nutritious twist – Goji berries are packed with antioxidants, adding a healthy boost to your indulgent bake.
-
Stays fresh longer – The enriched dough and fermentation process improve shelf life without the need for preservatives
What is the Old Dough Method?
-
Develops a more complex aroma and taste
-
Improves the structure and shelf life of the bread
-
Shortens fermentation time for the final dough
In this recipe, I prepare the old dough from scratch a day ahead and refrigerate it overnight to allow the flavors to mature.
How To Make Goji Berry Brioche
Ingredients (Yields: 2 Loaves)
Step-By-Step Instrucstion
- Old Dough
- Blend goji berry with water and milk in a blender to make a juice.
- Combine goji berry juice, yeast and bread flour in a bowl of stand mixer. Then mix with paddle attachment. Roll into a ball and place in a greased bowl. Cover with cling film and let it proof 1 hour in room temperature (28C – 30C).
- After 1 hour, place into the refrigerator overnight for at least 12 hours or up to 16 hours. Fridge temperature 2C - 4C. The next morning, take out the old dough from refrigerator to return to room temperature 30 minutes before using. You can also use directly from the fridge if you forget to take out earlier.
- If you don't plan to bake the next day, after 1 hour fermentation, shape it into a ball and wrap it in cling wrap or place it in a ziplock bag. Store it in the freezer for 1-2 months. Take it out 30 minutes before using to defrost.
- Main Dough:
- Put all ingredients (except butter and dry goji berry) into a bowl of stand mixer. Using the paddle attachment, mix for around 2 minutes or until all incorporated. Change to hook attachment and knead for another 3 minutes or until the dough comes together. Add in butter and continue knead for 12 - 15 minutes or until reach window pane stage. During the whole kneading process, I stopped few times to scrape down the dough from the hook to be sure it is evenly kneaded and also to prevent the motor from overheating.
- Fold in dry goji berry. Round up the dough and put back in the same bowl. Cover with lid and let the dough rise in a warm place for 45 to 60 minutes or until double in size.
- Shaping:
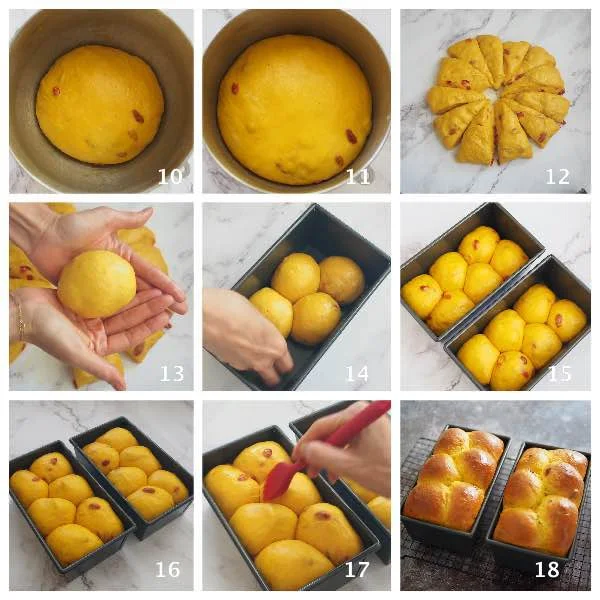
- Punch down the dough to release the air. Transfer the dough to a clean floured or oiled surface then divide into 12 equal portions.
- Form each portion into a ball.
- Place all the dough in the prepared loaf pans. 6 dough into one pan.
- Let the dough rise for about 45 minutes or till 80% increase in size, slightly below the rim of the pan.
- To bake:
- Preheat oven at 180C - 190C (top & bottom heat) or 160C - 170C (fan-forced) for 15 minutes before baking.
- Brush with egg wash.
- Bake in a preheated oven for 25 - 30 minutes, or until golden brown. If it is browning too quickly, cover the top loosely with aluminium foil.
- Remove bread from oven and let them cool on rack completely before slicing.
Must-Know Tips Before You Start
- Gluten Development
- Gluten is key to creating soft, airy bread. It forms when flour is hydrated, giving the dough strength and structure. To encourage proper gluten development, use techniques like autolyse or kneading. You can check if the dough is ready with the windowpane test — the dough should stretch thin without tearing. In my experience, high-hydration doughs with a generous amount of fat are easier to stretch and can achieve an almost paper-thin windowpane stage.
- Kneading:
- Please regard the timing provided as an indication only. It is only meant as a guide. Times vary by flour and mixer type. For higher fat dough, knead longer (18–20 minutes).
- Flour & Hydration:
- Use high-gluten flour for optimal texture. Always reserve some liquid to adjust dough consistency for best results. If dough is too dry, add the reserve liquid one tablespoon at a time until the right consistency.
- Dough Temperature:
- Maintaining the right dough temperature during kneading is crucial for a fine crumb. If the dough becomes too warm, the crumb will become too big and uneven. To prevent this, use cold water, milk, or eggs, and chill your mixing bowl or hook attachment in the freezer. Knead at low speeds, and if your kitchen is warm, rest the dough in a cooler spot. Proper dough temperature ensures a soft, fluffy bread with a fine, even crumb.
- Proofing:
- Proofing time depends on your environment. Use the finger poke test to gauge readiness. To check dough readiness, lightly press the side with your finger:
- If it bounces back instantly, it’s under-proofed and needs more time.
- If the indentation stays, it’s over-proofed.
- If the indentation slowly bounces back, it’s ready to bake.
- There’s also a final rise called oven spring when the dough bakes, which adds to the bread’s height.
- Wrinkle Top or Shrinking:
- If your bread collapses or develops wrinkles on top after baking, it might be over-proofed during the second rise. Aim for the dough to rise to 80-90% of its final size or just below the rim of the pan to prevent this. Over-proofing leads to weaker structure, causing the bread to lose shape.
- Baking & Oven Temperarate:
- Do also note that the baking temperature and timing provided are what works for my oven and should also be regarded as a guide only. Every oven behaves a little differently, so please adjust accordingly for your oven.
Storage Tips
-
Store in an airtight container at room temperature for up to 3 days.
-
Freeze individual slices or rolls for longer storage. Thaw at room temp or microwave briefly.
-
Store in an airtight container at room temperature for up to 3 days.
-
Freeze individual slices or rolls for longer storage. Thaw at room temp or microwave briefly.
What Makes This Goji Berry Brioche Unique?
-
Healthful Addition: Goji berries are known for their antioxidant properties and provide a lovely chewy contrast.
-
Old Dough Boost: Adds incredible depth of flavor without needing long fermentation.
-
Soft, Moist Crumb: Enriched with eggs, milk, and butter for that classic brioche softness.
-
Healthful Addition: Goji berries are known for their antioxidant properties and provide a lovely chewy contrast.
-
Old Dough Boost: Adds incredible depth of flavor without needing long fermentation.
-
Soft, Moist Crumb: Enriched with eggs, milk, and butter for that classic brioche softness.
FAQs
Can I make this recipe without the old dough?
Yes, but the flavor won’t be as complex, and the crumb might not be as fine. I highly recommend using old dough for best results.
Why didn’t my brioche rise well?
Check your yeast activity and room temperature. Also ensure the dough was kneaded well enough to develop structure.
Final Thoughts
This Goji Berry Brioche is not just a treat—it’s a wholesome, elegant loaf with great flavor and a story behind it. If you try this recipe, I’d love to see your results! Tag me on Instagram @bakewithpaws or leave a comment below with your feedback or questions.
Subscribe to Bake With Paws
Don’t miss a recipe!
Subscribe now and get sourdough tips, tried-and-tested bread recipes, and baking inspiration straight to your inbox.


The colour of this loaf is so beautiful!
ReplyDeleteHi, thanks for visiting and your kind comment :)
DeleteHello. Thank you for sharing your wonderful recipes. I like your blog very much.
ReplyDeleteI ran into a problem with this recipe, the preferment in particular. The old dough always turned gummy and mushy without any strength. I believe that the goji juice breaks down the protein in the flour. Which is confusing because your dough seems to be OK. What do you think is the problem?
Hi, thank you for trying this recipe. Sorry to hear that your old dough was gummy. May I know what type of flour that you used? Different flour absorb liquid differently. It could be your dough too wet too. Maybe try to cut down the liquid to about 60%. The above recipe is about 88% liquid for the old dough. You may want to try 20 - 25g goji + 55g water + 75g milk. If the dough too dry then you can add more milk or water.
DeleteI don't know about goji juice will break down the protein in the flour.
I hope this helps.
Cheers :)
Thank you for your reply! I tried making the old dough again without the goji and it was fine. There's probably something different about the goji berries available here. What a shame because I really liked the idea.
DeleteYou are most welcome. Great that you managed to find out the cause. Maybe you can try to cut down the goji to half and see what happen.
ReplyDeleteCheers :)