Breads (Sourdough) - Other Breads
Charcoal Sourdough Bagels Recipe – Soft, Chewy & Naturally Leavened
November 10, 2021
| Recipe by Bake with Paws
Last Updated on September 4, 2025
By Bake with Paws
Introduction
Bagels are one of the most iconic breads in the world, known for their chewy bite and glossy crust. They originated in Poland during the 17th century, where Jewish communities baked them as a festive bread, and later spread across Europe and North America. Today, bagels are enjoyed everywhere—from New York delis to artisan bakeries worldwide.
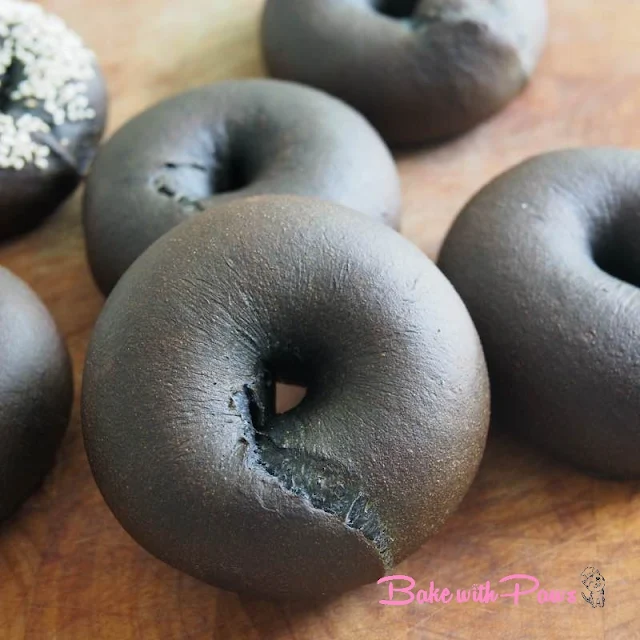
These Charcoal Sourdough Bagels take the classic recipe to a whole new level. Made with activated charcoal, they boast a dramatic black color that looks striking on any table. The charcoal adds no flavor, but it gives these bagels their unique appearance. Naturally leavened with a healthy sourdough starter, they stay true to tradition with their soft yet chewy texture, slight tang, and long fermentation benefits.
Whether served plain, topped with sesame seeds, or filled with your favorite sandwich ingredients, these bagels are sure to impress both in taste and appearance.
What Makes These Bagels Special?
They feature a striking charcoal-black crust, achieved naturally with activated charcoal—eye-catching without affecting flavor. Combined with a high-protein flour base and vibrant sourdough starter, these bagels deliver a chewy, soft texture that's both rustic and refined.

How To Make Charcoal Sourdough Bread
Ingredients (Yields: 6 Bagels)
Yudane Dough:
80g bread flour (I used Japan High Gluten Flour)
80g boiling water
Main Dough:
250g bread flour (I used Japan High Gluten Flour)
5g activated charcoal powder
140g active sourdough starter (use at its peak to get better result)
All the yudane dough (above)
15g - 30g brown sugar (I used organic brown sugar)
1 1/2 tsp (8g) salt
85g - 95g water (59% - 61% total hydration) - For the bread flour I used need 95g
15g vegetable oil (I used extra virgin olive oil)
Boiling/Scalding Water:
1 liter water
2 Tbsp brown sugar
1 Tbsp baking soda
Utensils:
Baking tray
6 pieces - 4.5" X 4.5" parchment papers
Step-By-Step Method
- Yudane (Prepare 1 day or at least 4 hours in advance):
- Add bread flour in a bowl, pour the boiling water and mix well with spatula or spoon until no dry flour.
- Cling film and use at least 4 hours later. You can prepare a day before and place in the fridge and Take out from the fridge 30 minutes before using to return to room temperature.
- Main Dough @ around 6.00 pm:
- Put all ingredients into a bowl of stand mixer.
- Slightly combine the mixture by hand with the paddle attachment before turning on the machine so that the flour will not splash out. Using the paddle attachment, mix for about a minute or until all incorporated.
- Change to hook attachment and knead for about 10 minutes or until the dough comes together and elastic. This is low hydration recipe and the dough is slightly stiff. It is not required to check window pane stage as it is not soft sandwich loaf or buns. The whole kneading process, I stopped few times to scrape down the dough from the hook to be sure it is evenly kneaded and also to prevent the motor from overheating.
- 1st Proofing @ around 6.30 pm:
- Round up the dough and place back in the same bowl, keep it covered with clingfilm or use a lid. Let the dough proof for about 2 hours on the counter (at room temperature 27C). The dough rose about 30% - 40% in size. It was raining day so I left the dough ferment for about 2.5 hours instead.
- Transfer to fridge @ around 9.00 pm and cold retard overnight for 12 - 15 hours.
- Shaping @ around 10.45 am:
- Remove the dough from the fridge and leave on the counter for about 30 minutes to return to room temperature.
- Transfer the dough to a clean floured surface then divide dough into 6 equal portions (approx. 113g - 115g each). Please use a kitchen scale if you want to be exact. Form each portion to a ball. Rest for 15 minutes.
- Flatten a dough ball. Roll like a swiss roll. Then roll into a long strand (about 10 inches length)
- Please watch the video "How To Shape Bagel"
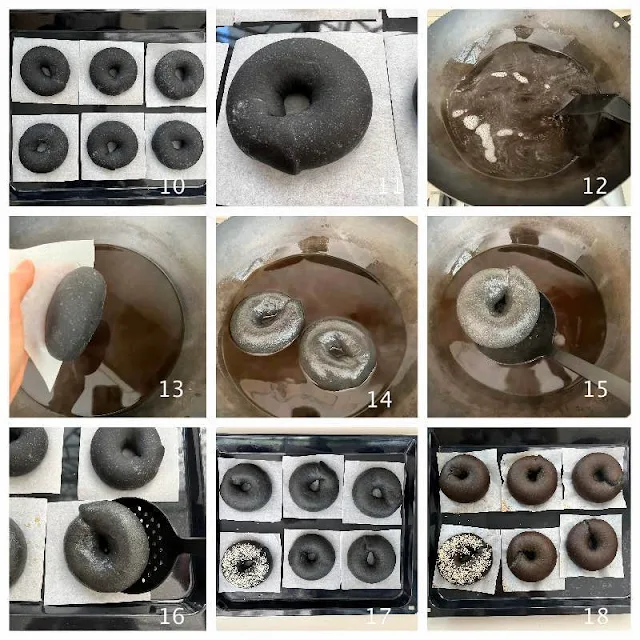
- Place each bagel onto parchment paper.
- Final Proofing @ around 12.00pm:
- I made marks with a pencil between 0.5 cm - 0.75 cm away from the original size of the bagels. Let them proof at a warm place until the dough rise and reach the pencil marks. It took about 2 hours at 29C room temperature. The duration of proofing depends on your ambient temperature and starter.
- Boiling/Scalding @ around 2.00 pm:
- In a sauce pan, combine the water, sugar and baking soda. Bring to boil then turn to low heat. Drop the bagels in and simmer each side for about 30 - 40 seconds. I simmer 3 bagels at one time.
- Remove the bagels with strainer ladle and place back onto the parchment paper. Arrange and place into a tray.
- Baking @ around 2.15pm:
- Preheat oven at 220C (top & bottom heat) or 200C (fan-forced) for 15 minutes.
- Bake in a preheated oven for about 20 - 22 minutes, or until golden brown.
- Remove bagel from oven and let them cool on rack.
Yudane Dough
Main Dough
Tips for Perfect Results
- Use an active, healthy sourdough starter – A strong starter ensures proper fermentation, good rise, and better flavor. Feed your starter regularly before baking.
- Choose the right flour – Bread flour or high-protein flour provides structure, chewiness, and oven spring. Whole wheat flour adds flavor but should be balanced with bread flour for strength.
- Prepare Yudane early – Mix flour with boiling water and let it rest at least 4 hours or overnight. This improves softness and helps bread stay fresh longer.
- Add water gradually – Don’t add all the liquid at once. Different flours and porridges absorb water differently, so add in stages until the dough feels right.
- Don’t under- or over-proof during final fermentation – Use the finger poke test: gently press your finger into the dough. If it springs back slowly and leaves a slight dent, it’s ready to bake.
- Cold retard overnight – Enhances flavor complexity and makes shaping easier.
- Bake at the right oven temperature – Generally, 200–220°C (390–430°F) works well. But each oven behaves differently, so know your oven and adjust temperature or timing accordingly.
- Cool completely before slicing – Letting the bread rest allows moisture to redistribute, preventing gummy crumbs.
FAQs: Quick & Helpful Answers
Q: Does the charcoal affect flavor?
No—activated charcoal delivers color only and is virtually flavorless and odorless.
Q: What flour gives the best texture?
High-gluten or bread flour (around 12% protein) yields ideal chew and structure.
Q: How long should the dough rise?
Proof until the dough passes the finger poke test—springy with a slight indentation remaining.
Q: How should I boil the bagels?
Boil briefly in water (optionally with malt or sugar) to form a firm crust; this step is essential for texture.
More Recipes You Might Love
-
Charcoal Open Crumb Sourdough Bread – an artisan loaf in dramatic black
-
Sourdough Bagel – soft and chewy
-
Charcoal Sourdough Burger Buns - Soft and Spectacular
Subscribe to Bake With Paws
Love bold, creative sourdough bakes? Subscribe via the pop-up box to get exclusive recipes, baking tips, and behind-the-scenes inspiration delivered straight to your inbox.
Have Questions or Tried the Recipe?
Share your charcoal bagels with us—leave a comment, post a photo, or tag @bakewithpaws on Instagram. Happy baking, and enjoy every bold black bite!


It looks so yummy, I will try this very soon
ReplyDeleteHi, Thanks, Cyball.. Good to hear that you bake too :)
Delete